 Finding a trouble-free used car has nothing to do with luck and everything to do with applying good research and investigative skills. Knowing how to spot potential problems and determining how reliable a used vehicle is can save you from expensive automotive headaches down the road. The following advice can help you determine whether a used vehicle is a good value or potential trouble.
1. CHECK THE RELIABILITY RECORD.
A good way to reduce the risk of purchasing a trouble-prone vehicle is to select models with a good reliability record before you begin shopping. Consumer Reports’ annual subscriber survey provides exclusive real-world reliability information that can help you narrow your selections. See Best and worst used cars for a quick-reference list of the best and worst used cars from our most recent survey. Also read the reliability-history charts that accompany most of CR’s vehicle profiles to get a more detailed view at how specific models have held up in 17 trouble areas as well as overall.
2. READ THE WINDOW STICKER.
The Federal Trade Commission requires dealers to post a Buyer’s Guide in every used vehicle offered for sale. Usually attached to a window, it must contain certain information, including whether the vehicle is being sold “as is” or with a warranty, and what percentage of repair costs (if any) the dealer is obligated to pay. The Guide information overrides any contrary provisions in your sales contract. In other words, if the Guide says that the vehicle is covered by a warranty, the dealer must honor that warranty. If any changes in coverage are negotiated, the Guide must be altered to reflect them before the sale.
If a sale is designated “as is,” it means that the dealer makes no guarantees as to the condition of the vehicle, so any problems that arise after you have made the purchase will be your responsibility. Many states do not allow as-is sales on vehicles selling for more than a certain price.
3. CHECK THE EXTERIOR.
Begin by doing a walk around of the car, looking for dents, chipped paint, mismatched body panels or parts, broken lamp housings, and chipped windows. Gaps between body panels should be of a consistent width and line up.
A closer inspection can reveal paint overspray on chrome or rubber trim or in the vehicle’s wheel wells. This is a telltale sign of body-panel repair.
Test for the presence of body filler with a small magnet. If the magnet doesn’t stick to the panel, the car may have filler under the paint (some vehicles with plastic or fiberglass panels, however, won’t attract a magnet at all). A door, hood, or trunk that doesn’t close and seal properly is evidence of previous damage and/or sloppy repair work. A CAPA (Certified Automotive Parts Association) sticker on a body panel means the part has been replaced. Inconsistent welds around the hood, doors, or trunk also indicate repair.
4. CHECK THE INTERIOR.
A long look into the cabin can reveal many obvious problems, such as a sagging headliner, cracked dashboard, and missing knobs, handles, and buttons. Frayed seat belts or ones with melted fibers (because of friction) may be evidence of a previous frontal impact above 15 mph-damaged safety belts should always be replaced.
Prematurely worn pedals or a sagging driver’s seat are signs that the vehicle has very high mileage. An air bag warning light that stays lit may indicate that a bag has deployed and been improperly replaced-or not replaced at all. A mildew smell, caused by a water leak, can be very hard to get rid of. Discolored carpeting, silt in the trunk, or intermittent electrical problems may be signs of flood damage.
5. CHECK UNDER THE HOOD.
At first glance, the engine, radiator, and battery should be relatively grease-free and have very little or no corrosion. Belts and hoses should be pliable and unworn. Look for wet spots, which can indicate leaking oil or fluids. Melted wires, tubes, or lines, or a blackened firewall may be signs of overheating or even an engine fire.
With the engine cool, insure that all fluids are clean, filled to the proper level, and do not have leaks. Check the engine oil while the engine is cool. Remove the dipstick from its tube and clean it with a dry rag, reinsert it and remove it again. The oil level should be between the “full” and “add” marks. Normal engine oil is brown or black, depending on when it was last changed. Gritty or gelatinous oil may indicate long stretches between oil changes. Thin, frothy oil that’s the color of chocolate milk may point to a blown head gasket or to a severely damaged block or cylinder head. Fine metal particles in the oil indicate internal damage or heavy wear.
The transmission fluid dipstick is usually located in the rear of the engine compartment. Check it right after the car has been driven for more than 10 minutes. With the engine at idle and both the brake and parking brake applied, shift through all the gears. Leave the engine running and put it in neutral or park (according to the owner’s manual) and check the level in relation to the dipstick marks. Also inspect the fluid’s condition. The transmission fluid should be bright red to light reddish brown, not dark brown, black, or mustard colored; those colors can indicate serious problems. If it has a strong burned smell, that can indicate severe wear.
6. CHECK THE TIRES.
Wear should be even across the width of the tread and the same on the left and right sides of the car. Tires that are frequently used while over-inflated tend to have more wear in the middle; tires driven while under-inflated tend to wear more on the sides. Heavy wear on the outside shoulder near the sidewall of the tire indicates a car that has been driven hard. This can be a sign that other parts of the car may suffer from excessive wear due to aggressive driving. Cupped tires, those that have worn unevenly along the tread’s circumference, can indicate various problems with the steering, suspension, or brakes.
7. CHECK THE STEERING.
With the car idling, turn the steering wheel right and left. Check that there isn’t any slack or “play,” or clunking noise in the steering. Excess play may indicate a worn steering gear or damaged linkage.
While driving at normal speeds on smooth, flat pavement, the car shouldn’t wander or need constant steering corrections. A shaking steering wheel often indicates a need for a wheel balancing or front-end alignment, which are easily remedied. However, this may also be a clue that there’s a problem with the driveline, suspension, or frame, which could mean expensive repairs are in order.
8. CHECK THE SUSPENSION.
Check the suspension by pushing down hard on each fender and letting go. The car should rebound softly, once or twice. More than two severe rebounds indicate worn shock absorbers or struts. Also, drive the car over a bumpy road at about 30 mph. A car that bounces and slams at moderate speeds over common pavement may have a worn or damaged suspension.
9. CHECK THE TAILPIPE.
A puff of white smoke upon start-up is probably the result of condensation and not a cause for alarm. Black smoke after the car has warmed up indicates an overly rich air-fuel mixture-usually due to a dirty air filter, a faulty oxygen sensor, or mass-air meter (which measures the amount of intake air). Blue smoke indicates oil burning-a bad sign, requiring expensive repairs. Billowing white smoke indicates water in the combustion chamber, usually because of a blown head gasket, damaged cylinder head, or even a cracked block-all expensive repairs.
10. STEP ON THE GAS.
While driving, does the engine rev excessively before the car accelerates? This is a common sign of a misadjusted or worn-out clutch, or a damaged automatic transmission. A clutch adjustment is a relatively inexpensive service, but a damaged clutch or automatic-transmission repair can be extremely expensive.
Listen for knocks and pings while accelerating. These indicate bad ignition timing or an engine beginning to overheat.
11. CHECK FOR RECALLS AND TSBS.
Check to see if any recalls were issued and if recall service was performed. The National Highway Traffic Safety Administration (www.nhtsa.dot.gov; 800-424-9393) lists all official recalls. Ask the seller for documentation on recall service. If any recall work has not been performed on a car that you’re considering, it should be done as soon as possible. Automakers are required to perform recall service free of charge, regardless of the vehicle’s age or how long ago the recall was issued.
Technical Service Bulletins, or “TSBs,” are reports a manufacturer sends its dealers about common or recurring problems with a specific model, and how to rectify them. Because TSBs aren’t typically safety related, manufacturers are not obligated to notify owners or pay for the repairs, though an automaker may pay for some or all of the work-if an owner asks them to. Lists of TSBs can be found at www.nhtsa.dot.gov/cars/problems/tsb/index.cfm. Check for any TSBs that were issued for the model you’re buying and if the seller had any necessary repairs performed.
12. CHECK THE VEHICLE’S HISTORY.
A vehicle-history report from CarFax (www.carfax.com) or Experian Automotive (www.autocheck.com) can alert you to possible odometer fraud; reveal past fire, flood, and accident damage; or tell you if a rebuilt or salvage title has ever been issued for the vehicle. To access this information, provide the vehicle identification number, or “VIN,” which is on the top of the dashboard, near the driver’s side roof pillar. Reports should cost $15 and the process takes about five minutes. (CarFax’s Web site provides Consumer Reports’ advice and information on buying used cars.)
13. VISIT A MECHANIC.
Before you buy a used vehicle, have it inspected by a qualified mechanic that routinely does automotive diagnostic work. A thorough diagnosis should cost around $120. An organization called the Car Care Council (www.carcare.org) certifies diagnostic shops. If you’re an American Automobile Association (AAA) member, you could use one of the organization’s recommended facilities.
In addition to doing the basic diagnostic, ask the mechanic to put the vehicle on a lift and inspect the undercarriage. Kinked structural components and large dents in the floor pan or fuel tank can indicate a past accident. Welding on the frame suggests a damaged section might have been replaced or cut out during repairs. Have the mechanic look for fresh undercoating, which can be used to hide recent structural repairs.
A dealer should have no problem lending you the car to have it inspected as long as you leave identification. A private seller may be more reluctant, however. You should offer to follow the seller to the shop where the inspection will take place.
Related Posts
 Glut drives down used car prices
 Pros and cons of buying a used car
 Tips on Knowing When to Sell or Trade in Your Car
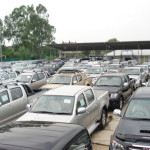 Pros & Cons of Buying a Used Car
 Guide to safety features
 Educate motorists and pedestrians on Thika superhighway, Kara advices
  How Kosgey Allowed Importation of Overage Vehicles
 A Guide to Car Insurance
 Shilling’s gain on dollar tilts scale for importers
 Top 10 Ugliest Car Grilles